The aim of this tutorial is to configure a SpringPark as a Network SmartReader/HTTP client. The SpringPark in this configuration acts as an HTTP client (default factory port is 80) and sends its tags to the server.
For this howto, we will assume that:
- your SpringPark is using a default (from factory) configuration.
- you have some networking basis.
Our SpringPark will output tag information using the MK1 format (FungyGate-IP compliant) and will use our demo page for events visualization.
We’ll see, in a forthcoming howto, that there are multiple output formats available.
You can find all the relevant files at the end of this tutorial.
Prepare the configuration file
To configure our SpringPark as networked SmartReader, we have to change its profile (cf. Profile configuration):
“Network option” has to be “HTTP client” and “Primary profile” has to be “Serial, SmartReader mode”
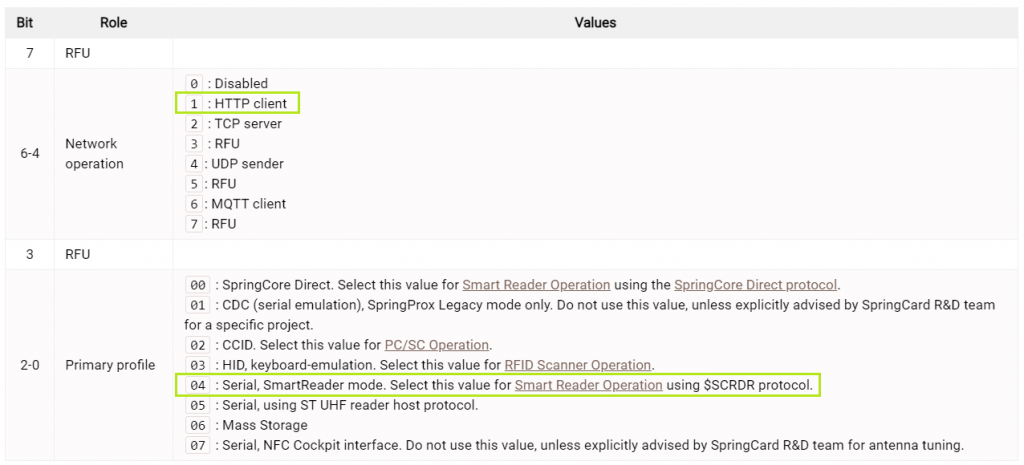
The final value of register 02C0 has to be 0x14.
There are multiple ways to send a configuration to a SpringPark. One of those uses JSON files and that is the format chosen for this howto.
Using DHCP
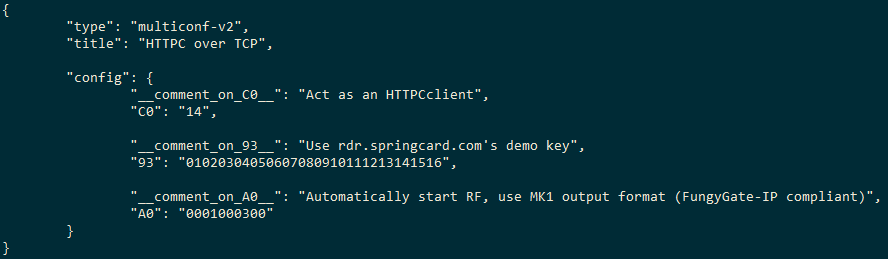
Nothing but register C0, 93 and A0 are set. Our SpringPark will request an IP address to the local DHCP server and will connect to the HTTP server on startup, on card events and on keepalive messages.
Using a static IP address
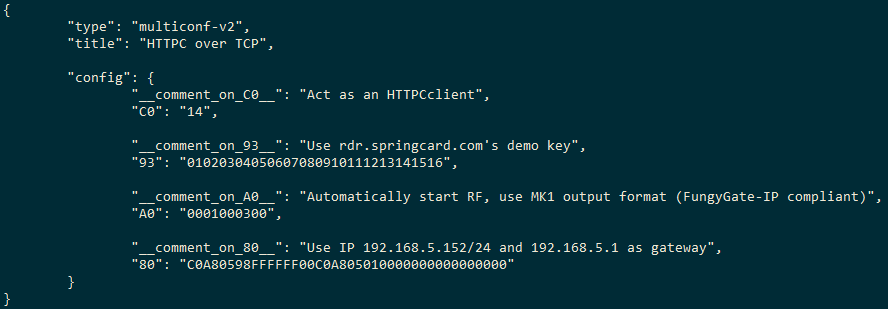
Same thing but register 80 is used to specify which IP address our SpringPark will use (cf. IPv4_Settings). This is a 20 bytes long register, all unused settings have to be set to 0x00.
In this example, I’m going to use those network settings:
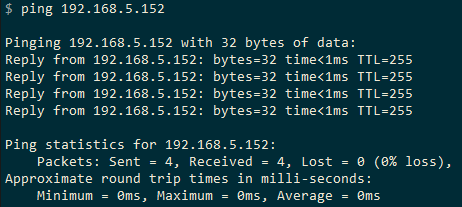
- IP address: 192.168.5.152
- Netmask: 255.255.255.0
- Gateway: 192.168.5.1
- DNS1: unused, 0.0.0.0
- DNS2: unused, 0.0.0.0
You can use online tools (like this one for example: https://convertir.github.io/outils/convertir-ip-en-hex-en-ligne.html) to convert your Ip settings to hexadecimal or simply use Windows’ calculator in Programmer mode:

Using SpringCoreConfig to write the parameters into the device
Your device has to be connected to the host using USB for the configuration stage (We’ll see, in a forthcoming howto, that there are multiple ways to set up a SpringPark) .
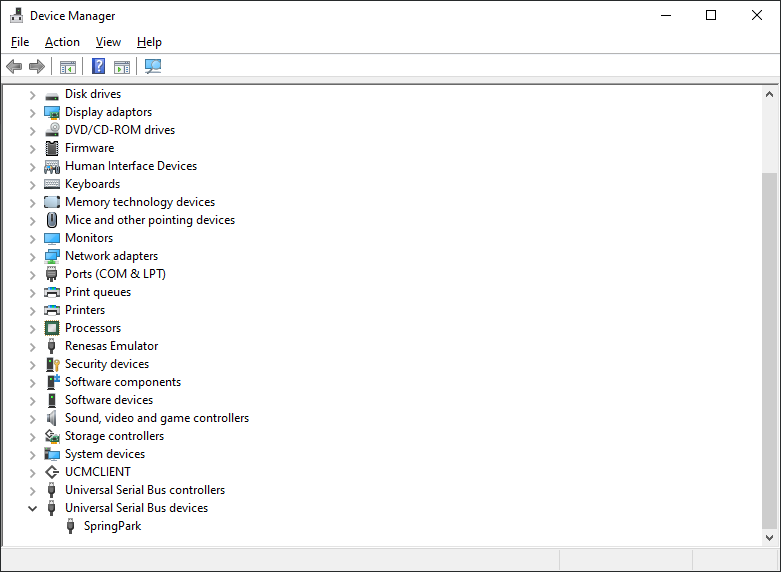
First of all, check if the device is well connected to your computer. You can first check if the device is present in the device manager:
You can also use SpringCardConfig.exe with the ‘-l’ option:

You can now push your configuration file to your SpringPark using SpringCardConfig.exe:
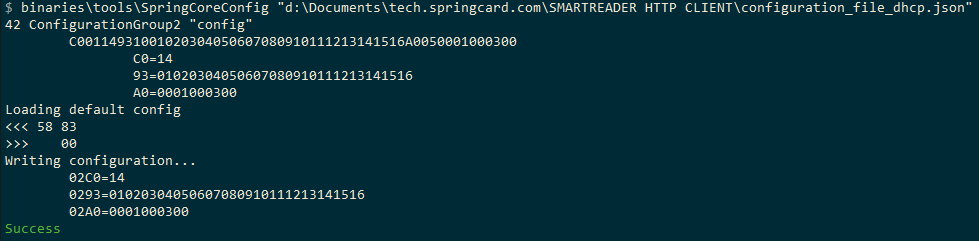
At this stage, your SpringPark will restart with its new configuration. You can then see, in the device manager, that your device is now seen with a different name:

Check if your device is present on the network
- using the ping command:
- using SpringCard’s Network Device Detection Utility (cf. NDDU):

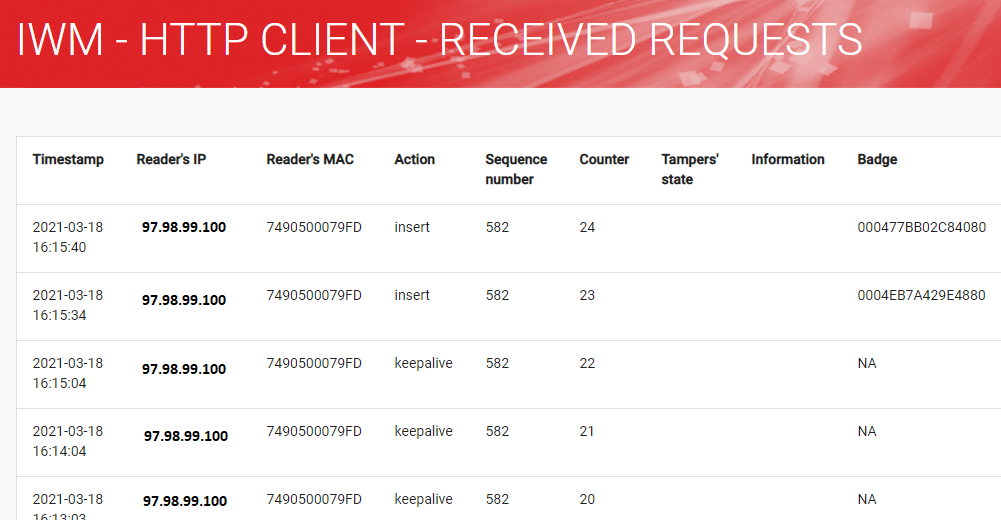
View events from your device
You can use our demonstration page to see events from your device: http://rdr.springcard.com/iwm2/
For more informations
You can of course, after trying this demo, use your own server.
All the relevant informations (configuration/protocol) could be found on this page: