This document explains how to upgrade the S663’s, the Funkygate-DW’s and the Funkycode DW‘s firmwares, using the Renesas Flash Development Toolkit (FDT).
Please read the datasheet of every product for specifications and the detailed list of features.
Important disclaimer:
Please note that SpringCard is not responsible for any procedure that end user performs. Please note that not products can be recovered from improper firmware upgrade or mis-configuration !! YOU’RE FOLLOWING THIS PROCEDURE AT YOUR OWN RISK.
Getting started
Requirements
To be able to upload your firmware properly on the S663/Funkygate-DW/Funkycode-DW modules, you need a computer running on Windows Xp/Vista/7. You will also need at least one working USB port and, of course, a Springcard product featuring a S663/Funkygate-DW/Funkycode-DW module in flash mode.
Register on Renesas Website
This registration will be necessary to download Flash Development Toolkit. Please browse to : http://www.renesas.eu/
Download and install Flash Development Toolkit
Download and installation
Once the registration is complete, you can download the last Flash Development Toolkit “Release” (and not “update”) Version (currently v4.09) on the FDT download page:
You will then have to run the downloaded launcher and install FDT with all the default options.
Download latest firmware’s version
The link below will enable you to download directly the latest version of firmware: S663.
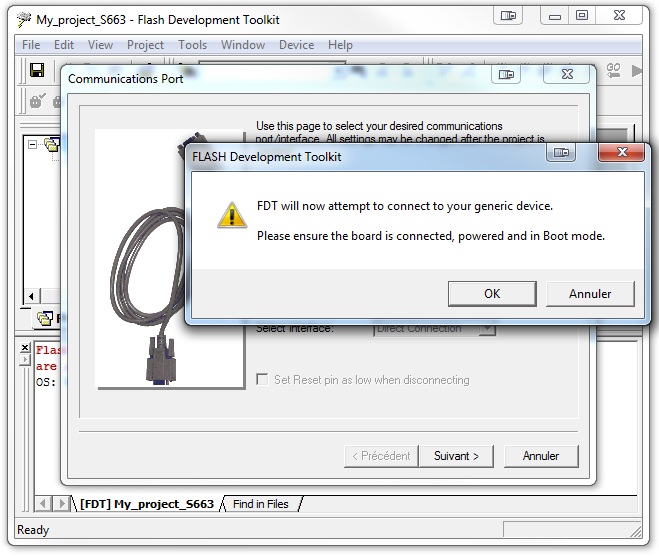
Ensure your device is ON and in Flash Mode
First you need to power up your device and plug the required serial interface. The RESET button appears on the middle right corner.

Look page 6 of this link to see how to power the device.
Link: https://files.springcard.com/pub/pmi14049-ab.pdf
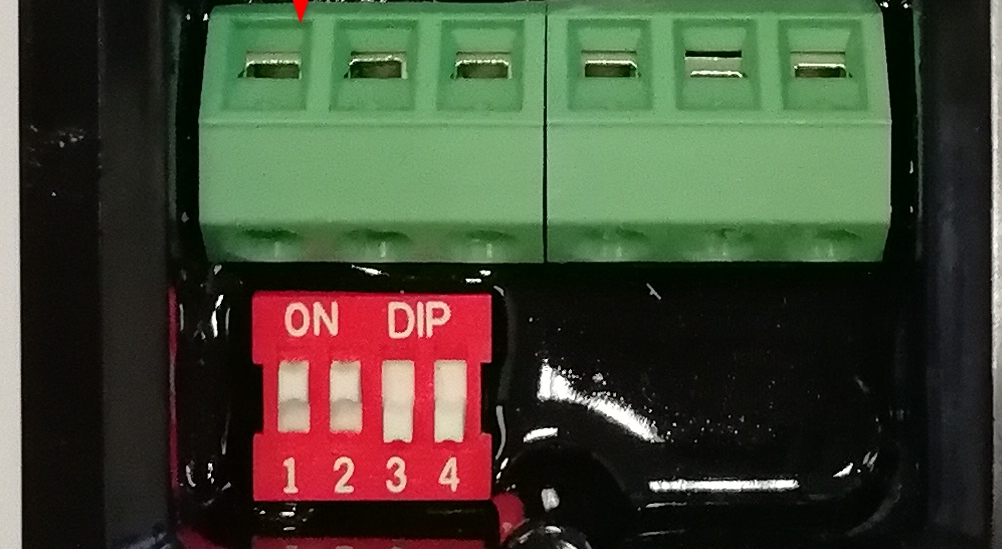
To enable flash mode, the switches must respect the following pattern :
- 1 – ON
- 2 – ON
- 3 – OFF
- 4 – OFF
Create a new FDT firmware upgrade project
- Launch the FDT application. A Welcome window will allow you to “Create a new project workspace“. Click “OK” to continue.
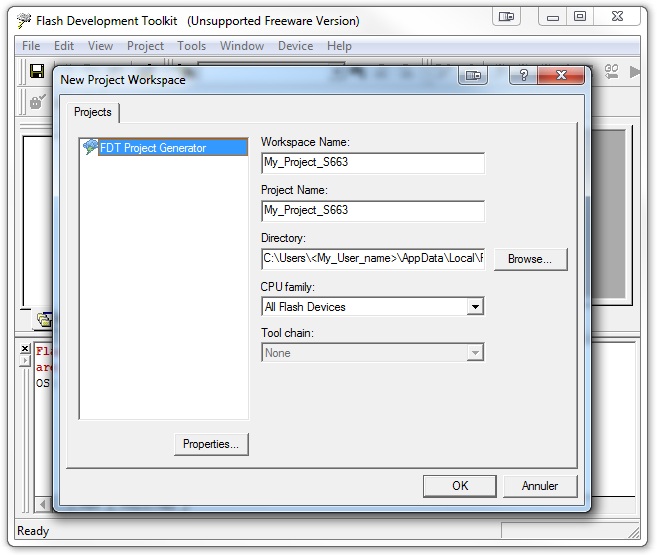
- New Project Workspace.
You will have to input the “Workspace name“ and “Project Name” of your choice and specify a valid project directory path. Ignore “CPU family” and click “OK” to continue.
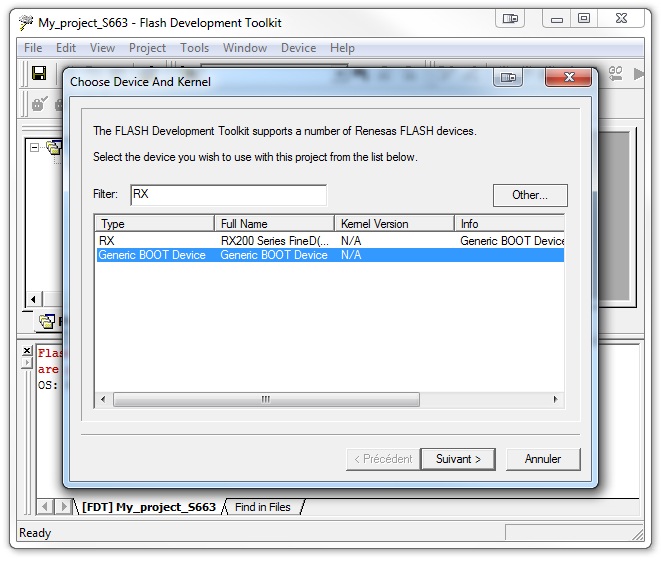
- Choose Device And Kernel.
Select “Generic BOOT Device” at the bottom of the scroll down control and click “Next” to continue.
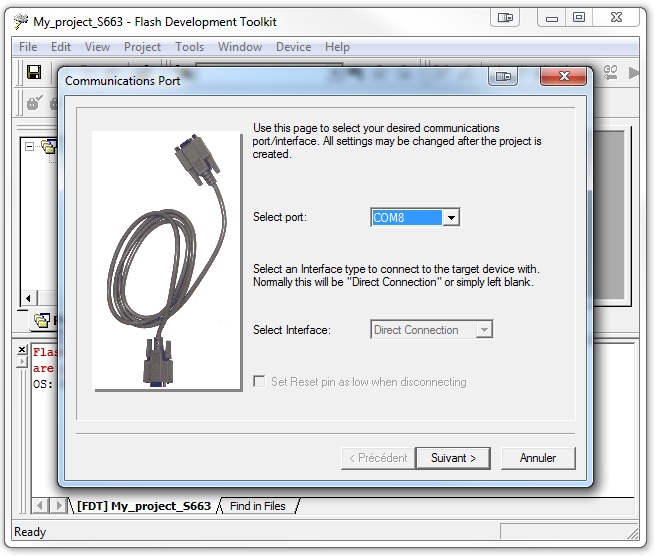
- Communication Port.
On the “Select port” control, please select the COM port corresponding to your serial interface and click “Next” to continue.
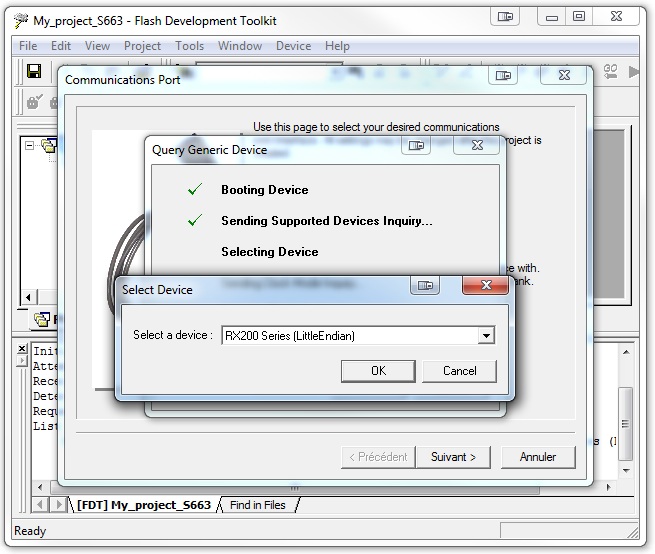
- Select Device. RX220 Series (Little Endian) must be already selected. Click “OK” to continue.
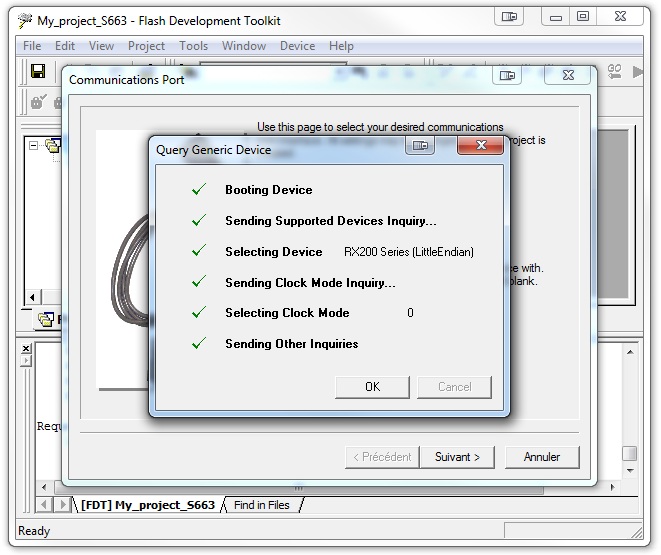
- After some automatic configurations, you will enter the Device Setting step. Keep the default settings (32MHz CPU crystal frequency) and click “Next” to continue.
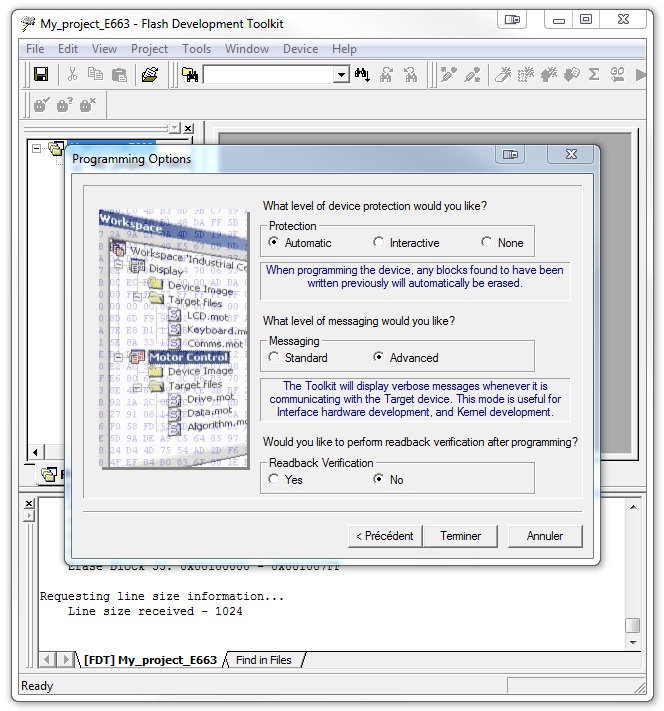
- Programming Options. Keep default settings then click on “Finish”.
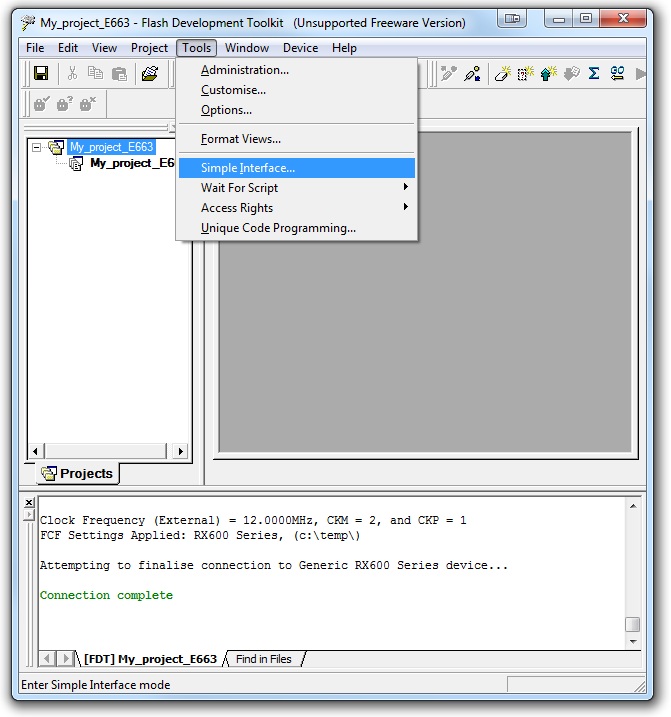
The firmware upgrade tool configuration is now over. Select Tools >> Simple Interface to simplify the project view.
 You can now specify the firmware binary in the “File/Image Selection” by selecting the “Download File” radio button then the “User/Data Area” checkbox and endly by clicking on the play button to browse the firmware file.
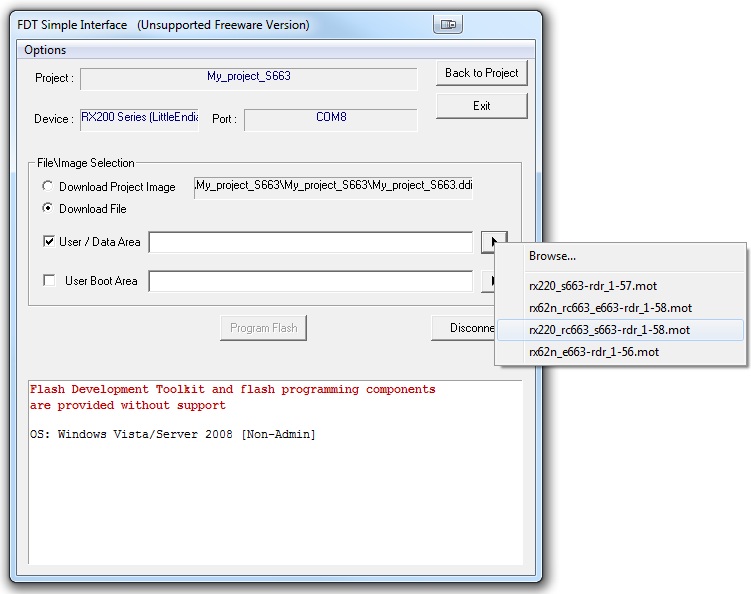
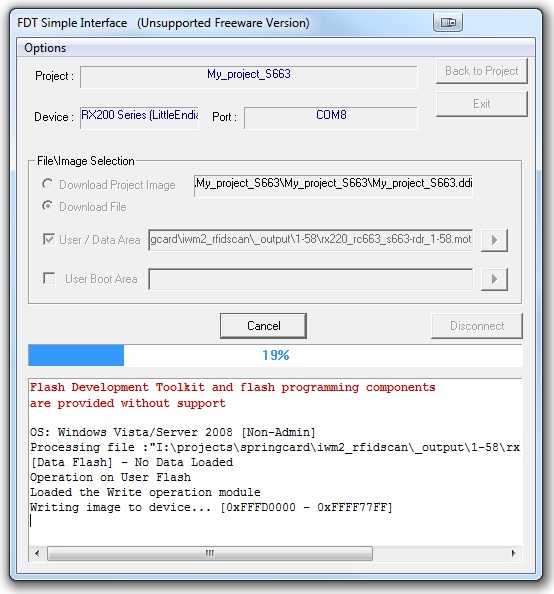
You can now click on “Program Flash” to load the new firmware in the reader’s flash memory and then on “Disconnect” to end the procedure.
Once the flash step is over, you can put your reader in play mode by setting the switches in the following configuration :
- 1 – ON
- 2 – OFF
- 3 – OFF
- 4 – OFF
Just press the RESET button and your reader is ready to be used! If you intend to flash your device several times, don’t forget to disconnect/reconnect after each firmware upgrade.