Products in the SpringCard CSB6 Family (CSB6, Prox’N’Roll PC/SC, EasyFinger and CrazyWriter) are smartcard readers, compliant with both standards PC/SC and CCID.
This makes those products usable on non-Windows operating systems thanks to PCSC-Lite CCID driver.
Introduction
PC/SC standard
PC/SC is the de-facto standard to interface Personal Computers with Smart Cards (and smartcard readers of course). Even if PC/SC has been initialy promoted by Microsoft -and has been implemented for long in Windows-, the standard is not limited to MS’ operating systems.
PCSC-Lite is an open source implementation of PC/SC, part of a global project named MUSCLE (Movement for the Use of Smart Cards in a Linux Environment). Despite its name, the PC/SC stack offered by MUSCLE is not limited to GNU/Linux anymore. Their compatibility list now includes other popular UNIXes, including Apple Mac OS X and Solaris.
CCID standard
The USB CCID specification published by the USB Workgroup aims to normalize USB smartcard readers, in order to have a single driver (supplied once for all with the operating system) for virtually any reader from any manufacturer.
PCSC-Lite project includes an open source CCID driver. This driver has been tested with SpringCard CSB6 on GNU/Linux, and should work on the other operating systems targetted by the project.
Disclaimer and warning
There’s no relationship between SpringCard and the developers involved in the open source PCSC-Lite project.
Apart from this explanation page, SpringCard can’t provide any technical support related to PCSC-Lite middleware nor PCSC-Lite CCID driver.
CSB6 Family on GNU/Linux
In this part we’re going to install PCSC-Lite and CSB6‘s drivers on Ubuntu 8.04.1 (Hardy). Some parts of the procedure may vary a little, depending on the GNU/Linux distribution you’re working with.
Do not connect the device to your computer now ! You must download and install the driver before connecting the product.
Download
Go to pcsclite.alioth.debian.org to download both PCSC-Lite and its CCID Driver :
PCSC-Lite : file named pcsc-lite-x.y.z.tar.bz2, “x.y.z” being the version number,
CCID driver : file named ccid-x.y.z.tar.bz2, “x.y.z” being the version number.
Installation
Connect as root.
Uncompress both archives.
N.B. : On Ubuntu (and on some other Linuxes), connecting as root is not possible. In this case, one must prefix every command by “sudo”, to gain root’s priviledges temporary.
Installing PCSC-Lite
Warning, on some Linux distributions, like Raspbian for example, the system comes with a pre installed lib but in an old version of pcsc-lite (for example an 1.8.3 or 1.8.5 version).
First uninstall the current version then install a new one, for example use the 1.8.11 version). Without an update, you should have some problems to run the daemon.
Before to install pcsc-lite you should also verify that libusb is up to date and if necessary install the dev version.
Open a terminal and go to the directory where you have uncompressed the PCSC-Lite archive. Enter the commands :
./configure

make

make install

Troubleshooting
If the configure step fails with message error: usb.h not found, check that you have the libusb library installed. If needed, please install it, and then give the path to this library to the configuration script: ./configure LIBUSB_CFLAGS=....
On Ubuntu or Debian, you may alternatively use apt-get to download and install the libusb-dev package :
apt-get install libusb-dev
Installing CCID driver
Open a terminal and go to the directory where you have uncompressed the CCID Driver archive. Enter the commands :
./configure

make

make install
Change Info.plist
With some old Linux distributions, the file called info.plist is not up to date so you may have to change it to work with our readers.
Locate the file called Info.plist, for example with a command like this one :
sudo find / -name Info.plist
You will, for example, find it in /usr/local/lib/pcsc/drivers/ifd-ccid.bundle/Contents/Info.plist
Edit the file to add your product’s IDs.
You can refer to the section dedicated to Mac Os X to see what you need to change.
Enabling PCSC-Lite daemon
PCSC-Lite’s pcscd process must be running in the background.
If you have some problems with the daemon you can launch it this way to see some error messages : pcscd -fd
If you see some error messages related to “permission denied”, try to launch make fix-rights from the folder where you have downloaded pcsc-lite (use sudo if necessary).
Starting pcscd manually
Open a terminal and go to the directory where PCSC-Lite has been installed. Typically, this is /usr/local/sbin/pcscd.
In this directory, enter the command ./pcscd.
Configuring pcscd to be launched on startup
It is better to have pcscd automatically started when the computer starts. To do so, you must add pcscd in the list of processes started in rc.local or equivalent startup script.
Connecting the device
Plug the device onto an unused USB connector.
In a terminal, use the command lsusb to verify device’s information.
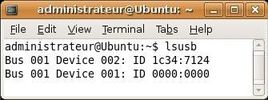
In the above screenshot, we have a CSB6 connected : Vendor ID=0x1C34 (Pro Active and SpringCard), Product ID=0x7124 (CSB6 Ultimate, PC/SC mode).
Other devices will have different ProductIDs ; all products in the CSB6 PC/SC family have a ProductID in the 0x7100 to 0x71FF range.
Validating the installation
To test the newly installed reader, we’ll use gscriptor, an open source PERL software, able to exchange APDUs with smartcards through the PCSC-Lite stack.
Installing PCSC-Perl
Go to ludovic.rousseau.free.fr/softwares/pcsc-perl and download pcsc-perl-x.y.z.tar.gz, “x.y.z” being the version number.
Uncompress the archive. Install the package as follow :
perl Makefile.PL

make

make install
Go to ludovic.rousseau.free.fr/softwares/pcsc-tools and download pcsc-tools-x.y.z.tar.gz, “x.y.z” being the version number.
Uncompress the archive. Launch the gscriptor program.
Card connect
Select the contactless slot of your CSB6 reader (usually the first reader in the the list),
Put any compliant contactless card on the reader,
Connect to the card (Reader -> Connect).
APDU exchange
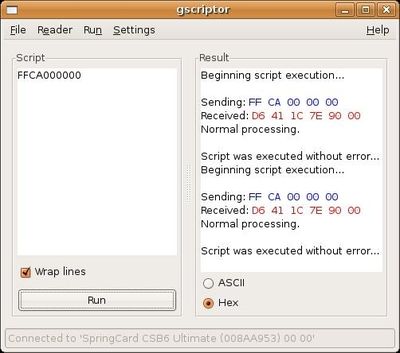
Write the APDU command in the script panel. You may use the command FF CA 00 00 00 (get card serial number) as a test.
Click Run. Observe card’s response in the result panel.
Well, in this test this not actually a response from the card… The command FFCA000000 is interpreted by the reader (CLA=FF is reserved for the embedded APDU interpreter), so it is the reader that actually answers. The returned data are the serial number of the contactless card. Remember, we’ve put ‘any’ contactless card on the reader, and querying the serial number is more or less the only command that is available for any kind of card…
Troubleshooting
If invoking gscriptor fails with message Can't locate Chipcard/PCSC.pm, re-install PCSC-Perl and/or verify PERL’s include directories.
Other tools
If you are not using a graphical user interface, you can still use pcsc scan to test your reader with some cards. From the command line, juste type pcsc_scan.
CSB6 Family on Mac OS X
Starting with MacOS X version 10.4, the PCSC-Lite package and the CCID driver are included in the system. We just need to add entries for SpringCard readers into the configuration file of the CCID driver to have them supported.
Configuring CCID driver to support our readers
Open CCID driver’s Info.plist
Open a Terminal window and enter this command :
sudo nano /usr/libexec/SmartCardServices/drivers/ifd-ccid.bundle/Contents/Info.plist
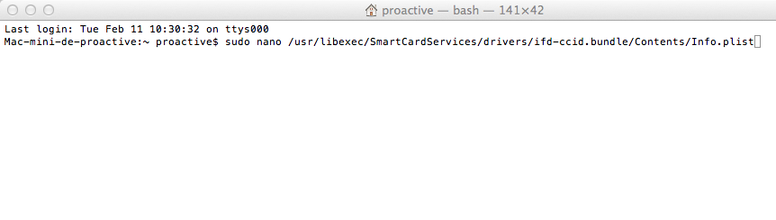
Note : the command may be splited into a few lines if your screen is too narrow. You must enter it at once, with only a single <Enter> at the end, after Info.plist
Enter your password if prompted to do so.
Note, if you can’t modify (or save) this file :
- Turn off your Mac
- Boot into recovery (when you press power button, you should be already holding cmd R keys, hold them as long as the display is clear white)
- In the recovery system, go in the menubar to Utilities > Terminal
- Terminal window will pop-up. Enter:
- csrutil disable
- Confirm with enter
- Close Terminal, restart the computer through Apple logo in top left corner
- From here on, the SIP is disabled and you can edit your file. It should be noted, that after you are done with your modifications, you should definitely re-enable the SIP. The method is same as above, the only difference is that you will type into Terminal:
- csrutil enable
Add SpringCard’s USB Vendor ID
Scroll down, locate the block beginning by <key>ifdVendorID</key>,

Scroll down until you reach the end of the block,
Add 3 occurences of the line <string>0x1C34</string>.
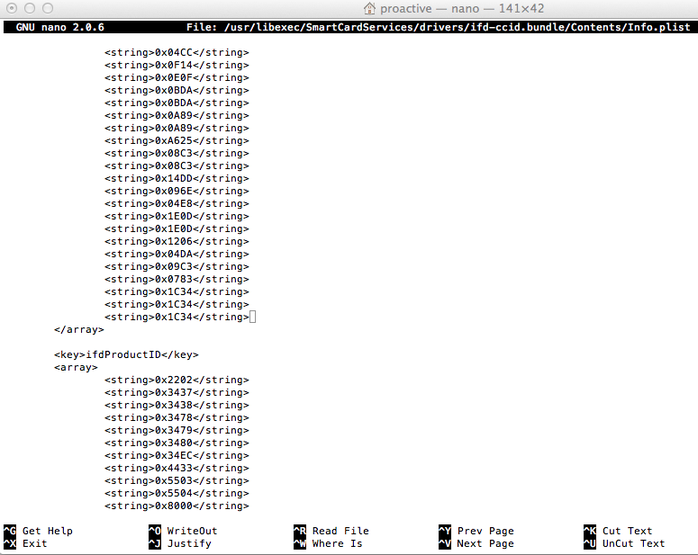
Note : We need to add our Vendor ID 3 times, because we are to support 3 different Product IDs.
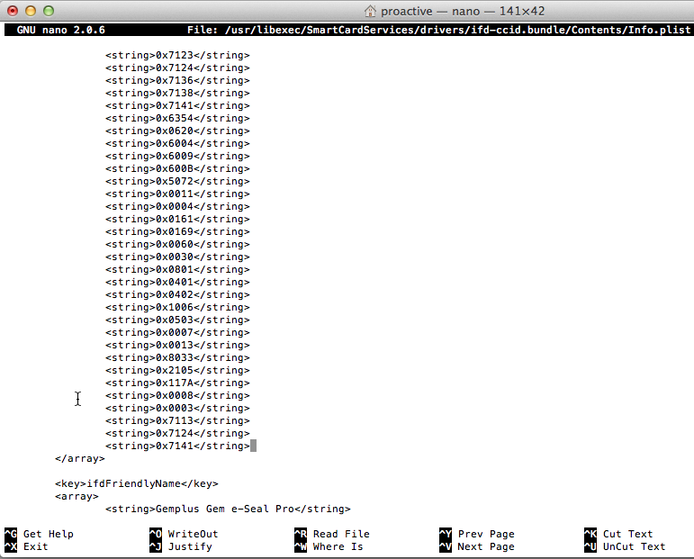
Add the Product IDs of SpringCard’s readers
Scroll down, locate the block beginning by <key>ifdProductID</key>,

Scroll down until you reach the end of the block,
Add the following lines :
<string>0x7113</string>

<string>0x7124</string>

<string>0x7141</string>
Add the names of SpringCard’s readers
Scroll down, locate the block beginning by <key>ifdFriendlyName</key>,
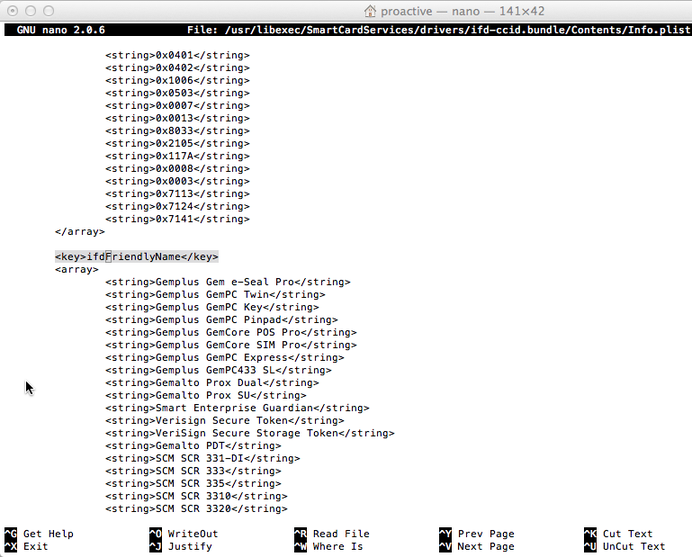
Scroll down until you reach the end of the block,
Add the following lines :
<string>CrazyWriter</string>

<string>CSB6 Ultimate</string>

<string>Prox'N'Roll</string>
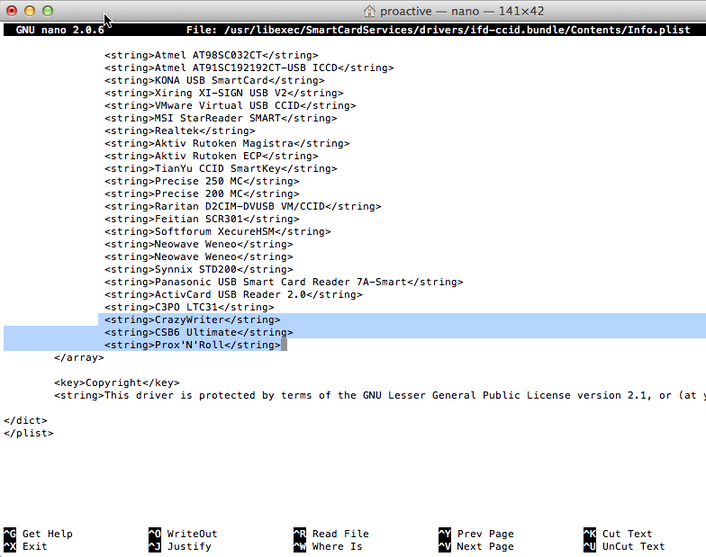
Save and restart
Save the modified file. Exit nano and restart the computer.
Validation
Plug the reader onto a computer’s USB port,
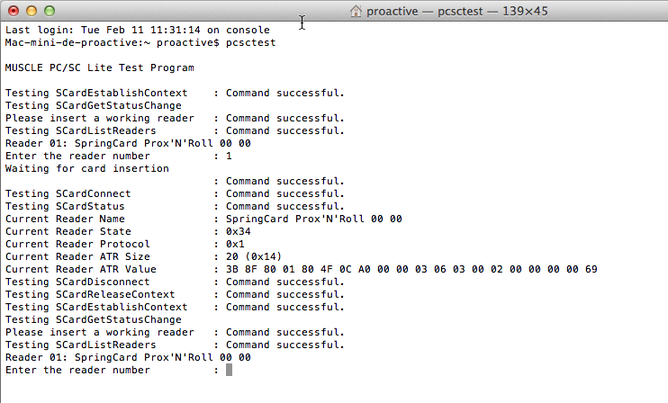
Open a Terminal window and enter the command pcsctest,
pcsctest displays the list of connected readers (in the following snapshots, only one Prox’N’Roll is connected),
Enter the number of the reader you want to test (in our case, only ‘1’ is allowed).
Put a card on the reader, and check that everything is running as expected.
In case of trouble
If you are experiencing problem(s), you can, in a terminal, launch this command to see if the daemon reports any error message :
sudo /usr/sbin/pcscd --apdu --debug --foreground
For example you could have a syntax error inside your Info.plist file.
You may also check in the activity monitor that you have a process called pcscd (you can use the search on the top right corner). If that’s the case, then the daemon is running.
If you have a problem with OS X 10.8 Mountain Lion, consult this forum (reported here) :
For all on OS X Mountain Lion.
There is an issue with the pcscd where when you boot OS X with your reader connected and card inserted, the daemon will not get launched properly.
Did not delve deeper yet but running pcsctest will say “Service not available”.
Manually killing it so it gets relaunched will do the trick or just not connecting your reader while booting.For all the eid applets out there, the result is the applet getting stuck on a “Please connect your reader” message.
A bugreport has been filed with apple, also hinting that it would be nice for em to update the ccid-driver and pcsc-lite for a change 🙂
As Ludovic states, the ccid-driver for example is 3 years old and by consequence is missing possibly bad support for 97 readers since t hat version 🙂source: http://ludovicrousseau.blogspot.be/2012/08/mac-os-x-mountain-lion-and-smart-card.html