SpringCard Companion is the new all-in-one solution to manage, configure and update the latest generation of SpringCard “SpringCore” devices (Puck, SpringPark, etc). SpringCard Companion is an hybrid application that combines a clean, efficient and always up-to-date web front-end with a tiny local software, the Companion Service, that is the gateway between the cloud and the devices connected to your computer or local network.
As such, the Companion Service is also the base component to connect any application built for the web with the ‘physical world’ of PC/SC couplers and Smart Readers, using only simple WebSocket and REST API calls.
Before you start using SpringCard Companion Web application (available at companion.springcard.com) you should install the Companion Service on a Windows computer.
Not using Windows? use the SpringCore Tools to get the best of your SpringCore devices even without the Companion.
Setup SpringCard Companion Service
Prerequisites
- Windows 10 (or later), 64 bits edition,
- Microsoft .NET Framework version 4.8 (or later),
- AMD64 / X64 platform, with at least 4 CPU core and 8GB of RAM,
- 20MB of hard drive,
- Web browser: Chrome, Firefox, Edge or Safari (only most recent versions, see the Browser support page at angular.io for more details).
Download
Download the SN20030 installer from springcard.com.
Choosing the installation ‘flavour’
Before running the installer, you should take a few minutes to consider how the SpringCard Companion Service will be used on this computer.
There are 3 ‘flavours’.
Flavour 1: single user, tray application
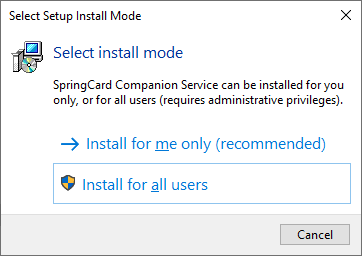
If you are this computer’s only (or main) user, choose “Install for me only”.
The SpringCard Companion Service will then run in a windowed application that sits in the system’s tray bar. You may also launch it manually only when you need to access the devices from the Companion Web app, and leave it idle the rest of the time.
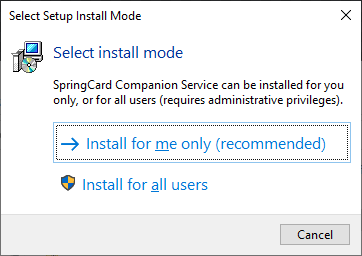
Flavour 2: all users, tray application
In case the computer is shared among many users and you want that SpringCard Companion Service runs in the system’s tray bar, choose “Install for all users”, then “Run Companion Service in the Tray application, inside user’s sessions”.
NB: installing for all users is possible only with elevated privileges. If your current account is not a system administrator, Windows will prompt you to enter an administrator’s login/password to run the setup.


In this flavour, users are still allowed to start/stop the SpringCard Companion Service according to their needs.
Flavour 3: system service
Installing the SpringCard Companion Service as an actual system service is the best choice for unattended machines (kiosks, ATM, etc.) or when deploying a specific software that relies on the Companion Service to access the devices.
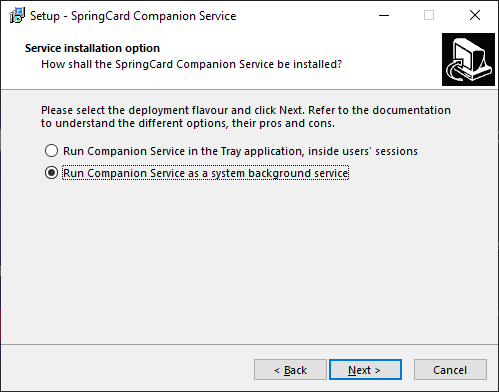
In this flavour, only administrations could start/stop the SpringCard Companion Service, as this is the case with any other system service.
Unattended installations
In large organizations, system administrators would typically deploy the Companion Service on all (or at least many) computers from a global policy; for kiosks, ATM, etc., scripts are used to automate the deployments as well.
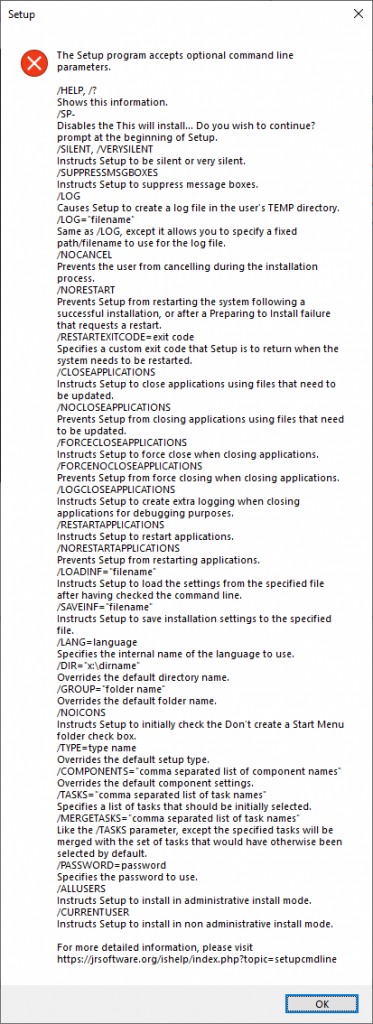
The SN20030 installer is specifically tailored to support the need of unattended installations. The setup supports specifying the ‘flavour’ on its command line.
For flavour 1, use
SN20030.EXE /SILENT /CURRENTUSER /FLAVOUR=1
For flavour 2, use
SN20030.EXE /SILENT /ALLUSERS /FLAVOUR=2
For flavour 3, use
SN20030.EXE /SILENT /ALLUSERS /FLAVOUR=3
Use the /HELP flag on the command line to see all other available options:
SN20030.EXE /HELP
Changing the flavour afterwards?
It is not possible to change the flavour only by running the setup again.
Basically, if the setup is runned without parameters, it will update (or downgrade) the software while keeping the existing installation flavour. If a /FLAVOUR= parameter is specified on the command line that is different to the existing installation flavour, the setup will exit with an error.
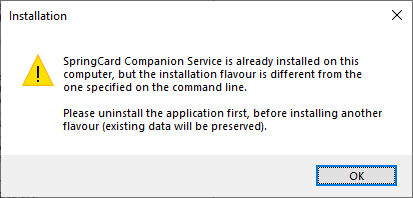
Should you need to setup a different flavour, please uninstall the software first, then install it again with the new flavour.
NB: to perform an unattended uninstallation, run unins000.exe /SILENT in the program’s installation folder (namely C:\Program Files\SpringCard\Companion\Service).
Access SpringCard Companion Web application for the first time
Make sure the Companion Service is running
At the end of the installation process, the SN20030 installer offers to launch the tray application (even in flavour 3, since the tray is a convenient UI to the service, even if the service actually runs in background).
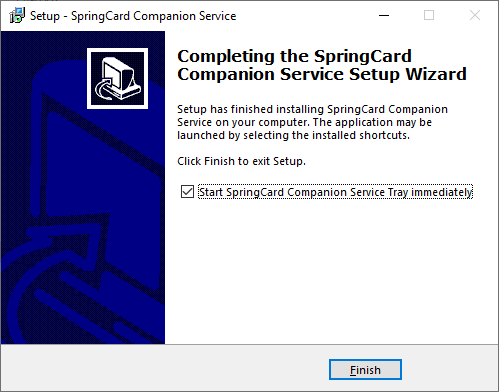
Leave the “Start SpringCard Companion Service Tray immediately” when finishing.
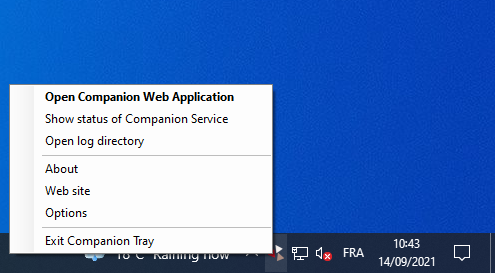
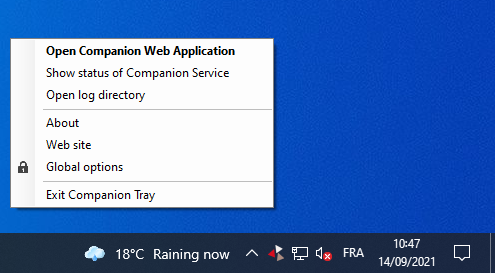
The Companion Service Tray’s splash screen is shown briefly:

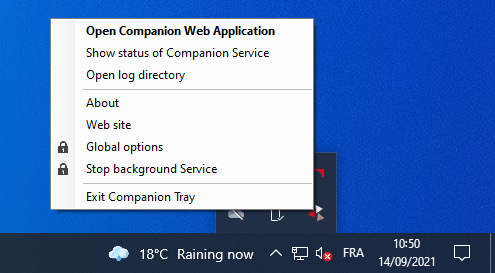
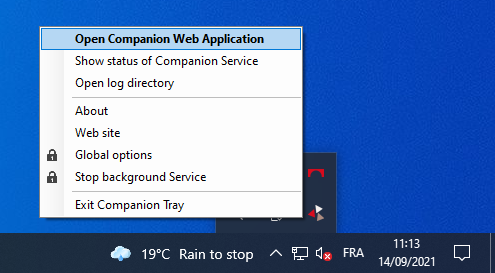
Locate the Companion icon in the system’s tray bar and right-click it.
Then click Open Companion Web Application.
Alternatively, you may directly navigate to https://companion.springcard.com in your web browser (Companion Web app supports the latest versions of Chrome, Firefox, Edge and Safari).
The browser then shows SpringCard Companion connection page.
Your SpringCard Companion account
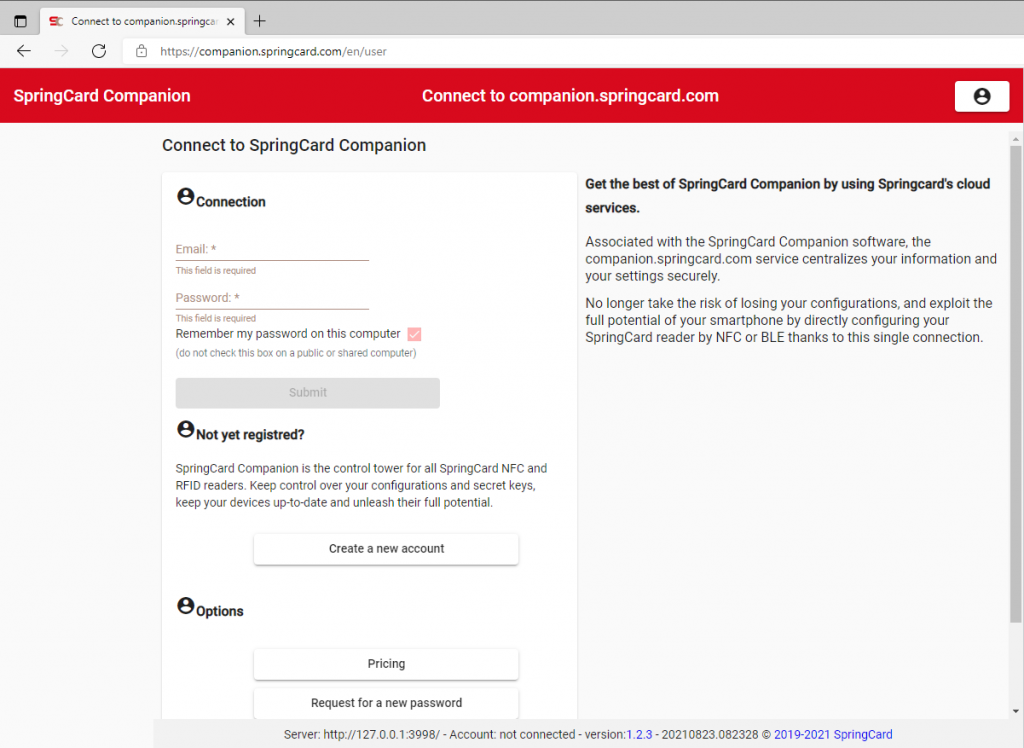
SpringCard Companion stores the configuration of your devices in the cloud. Therefore, you’ll have to create an account to use the application.
If you already have created an account, enter the associated email address and password to sign-in.
Otherwise, click Create a new account to register. Creating an account is free, and will always be, but a free account has a few limitations. See the Premium accounts paragraph below to discover the Single User and Team plans.
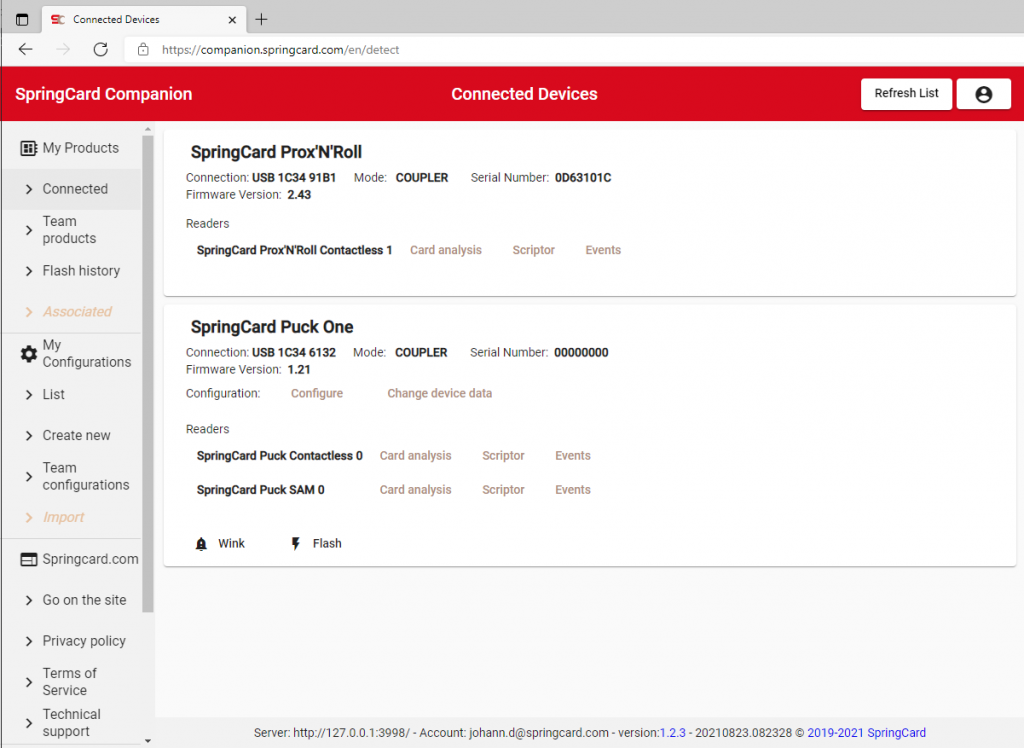
Once you are logged-in, SpringCard Companion shows the list of SpringCard devices that have been detected by the Companion Service that is running on your computer.
Coming soon: 2 articles showing how to use SpringCard Companion to configure a Puck and to update its firmware.
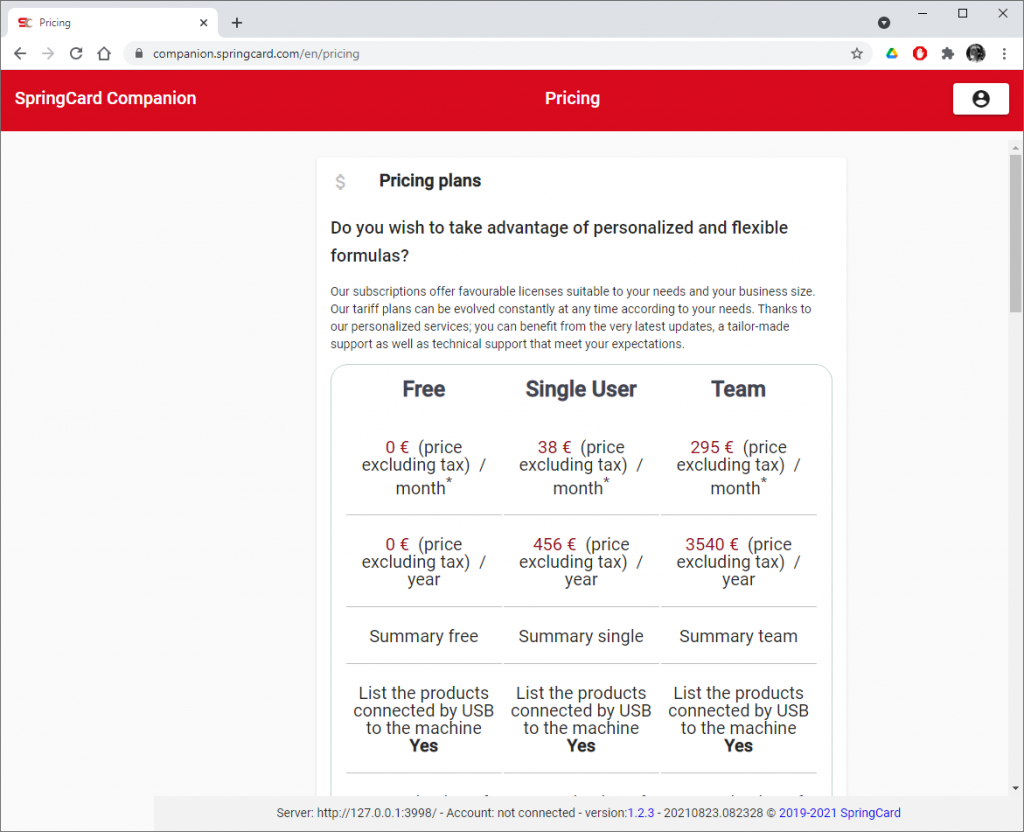
Premium accounts
Using SpringCard Companion to manage, configure and update your SpringCard devices is absolutely free, in the limit of 10 devices, 10 configurations.
The Single User plan supports 100 devices and an unlimited number of configurations.
The unlimited Team plan is recommended for organizations where configurations and device-information have to be shared among colleagues, or between providers and customers.
For more details, visit SpringCard Companion plans and pricing page.