The aim of this demonstration is to configure a SpringPark as a Network SmartReader/AWS client. The SpringPark in this configuration acts as an AWS IOT Core client (using TLS). It sends its tags/informations to Amazon’s cloud and can also receive commands.
We won’t cover the AWS’s side (lamba function, certificates, policies, …) but focuse on the device’s side.
For this howto, we will assume that:
- your SpringPark is using a default (from factory) configuration.
- you have some networking basis.
- you have some MQTT basis.
You can find all the relevant files at the end of this tutorial (including 5 demo credentials and a demo script client in Python).
Configuring the SpringCore device for operation with SpringCard’s test instance on AWS IoT Core
To configure our SpringPark, we first have to change its profile (cf. Profile configuration):
“Network option” has to be “MQTT client” and “Primary profile” has to be “Serial, SmartReader mode”
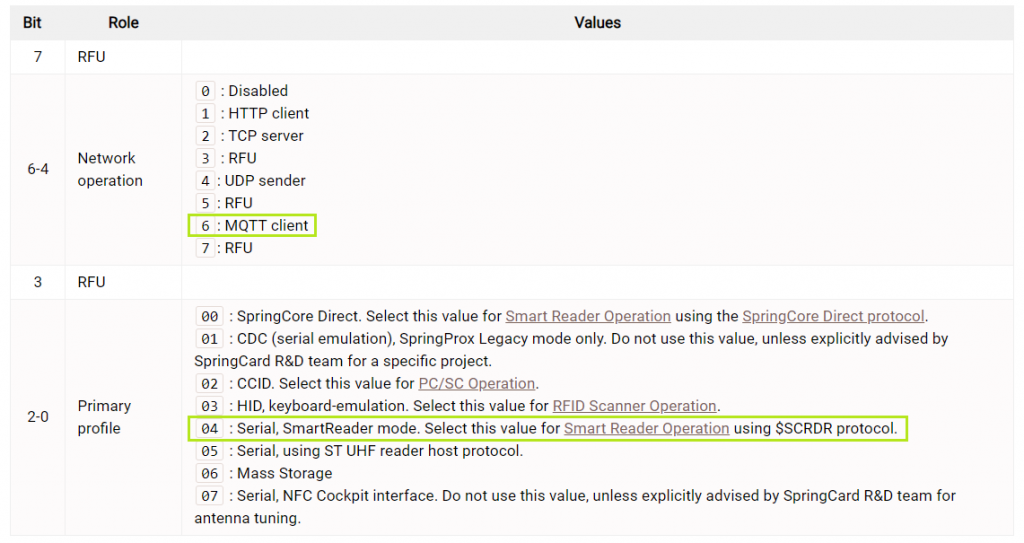
The final value of register 02C0 has to be 0x64.
We now need, to connect to our AWS IOT Core instance :
- a server to connect to : acztxc1o83ew9-ats.iot.us-west-2.amazonaws.com
- a TCP port: 8883
- a CA certificate: amazon.pem
- a Client certificate
- a Client’s Issuer certificate : (AWS requirement)
- a Client ECC key
To ease this demonstration, most of the requirements are already stored in you SpringPark at fatory time.
Using DHCP
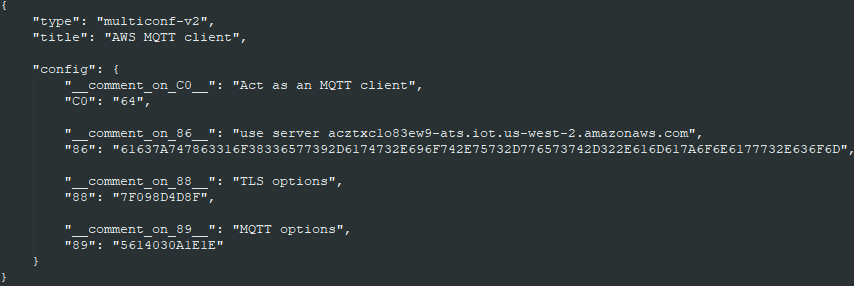
Nothing but register C0, 86, 88 and89. Our SpringPark will request an IP address to the local DHCP server and will connect to our Amazon IOT Core instance on startup.
Using a static IP address
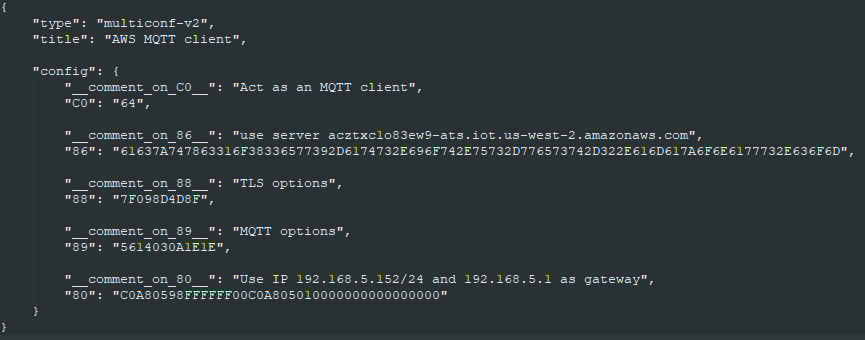
Same thing but register 80 is used to specify which IP address our SpringPark will use (cf. IPv4_Settings). This is a 20 bytes long register, all unused settings have to be set to 0x00.
In this example, I’m going to use those network settings:
- IP address: 192.168.5.152
- Netmask: 255.255.255.0
- Gateway: 192.168.5.1
- DNS1: unused, 0.0.0.0
- DNS2: unused, 0.0.0.0
You can use online tools (like this one for example: https://convertir.github.io/outils/convertir-ip-en-hex-en-ligne.html) to convert your Ip settings to hexadecimal or simply use Windows calculator in Programmer mode:

Using SpringCoreConfig to write the parameters into the device
Your device has to be connected to the host using USB for the configuration stage (We’ll see, in a forthcoming howto, that there are multiple ways to set up a SpringPark) .
First of all, check if the device is well connected to your computer. You can first check if the device is present in the device manager:

You can also use SpringCardConfig.exe with the ‘-l’ option:

You can now push your configuration file to your SpringPark using SpringCardConfig.exe:

At this stage, your SpringPark will restart with its new configuration. You can then see, in the device manager, that your device is now seen with a different name:

Validating the network configuration
SpringPark’s default behavior, when usb connected to a computer, is to disable its network interface (this is useful for reconfiguration. Options are available to change this behavior but that is not the aim of this howto). To start your SpringPark on the network, unplug all cords but the DC jack. You should see activity on both network interface LEDs.
Check if your device is present on the network
- using the ping command:

- using SpringCard’s Network Device Detection Utility (cf. NDDU):

Receive tags over the network
Please note that an AWS credential (certificate+key) can only be used once:
1 client = 1 AWS credential (last connected client always wins).
- using a Python script:

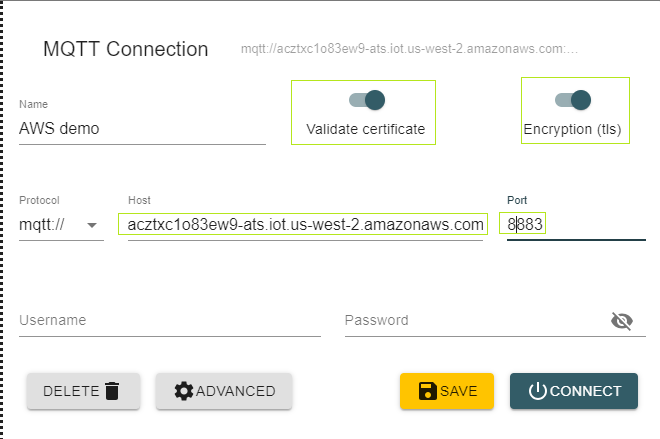
- using MQTT Explorer:
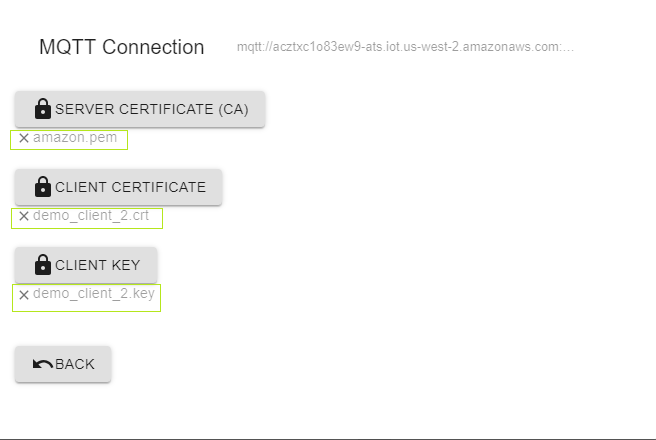
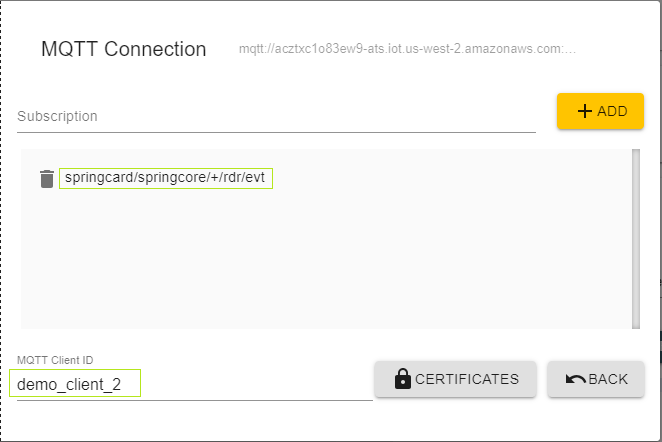
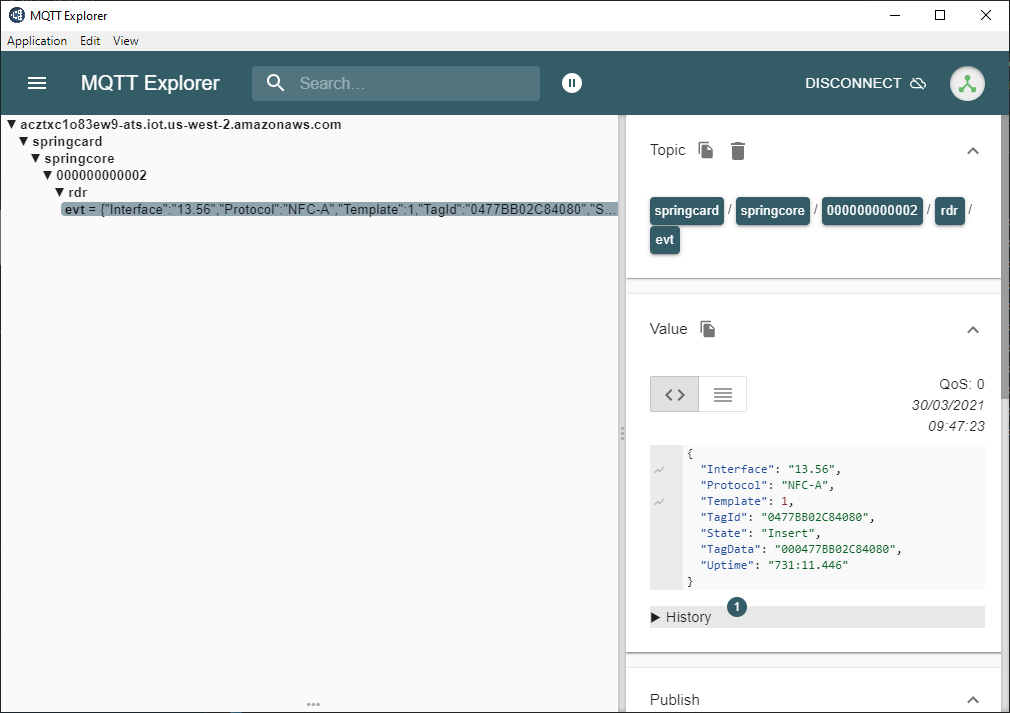
Understanding AWS MQTT+TLS implementation and authentication scheme
AWS IoT Core lets you connect IoT devices to the AWS cloud without the need to provision or manage servers. You just have to plug your device and voila but how does this work?
AWS uses a Just-in-Time registration system. It means that your device or client is created/registered on the Amazon cloud on the first connexion. To allow this, a valid credential must be used/stored in the device.
An AWS access credential is an X.509 certificate/key couple.
This X.509 certificate has been issued using a CA certificate already registered in the AWS IoT Core system:

In the X.509, we can see:
– our device’s informations (Certificate’s subject):
CN=demo_client_2,OU=SpringCore,O=SpringCard,L=Palaiseau,ST=Ile-de-France,C=FR
– which certificate has been used to create this device’s certificate (Certificate’s issuer):
CN=SpringCore SandBox CA,OU=SpringCore,O=SpringCard,ST=Ile-de-France,C=FR
Please note that on the first connexion (TLS), AWS will:
– check if your certificate is already registered (it will fail, it’s the first time this device connects to the AWS Cloud).
– look at your certificate’s issuer and check if this one is known in the AWS cloud (it is).
– register your device’s certificate in its own database and disconnect.
On the next connexion, AWS will check if your certificate is already registered (it is now) and will allow you device to connect.
This first connection behavior is applied to any access (device, client, manager, watcher, …).
Please note that AWS MQTT uses access rules for MQTT topics.
In this case the demo access on ly allows you to subscribte to topic springcard/springcore/+/rdr/evt.
Ready to connect SpringCore devices to your own cloud?
To ease this demonstration, we have already prepared all the AWS IoT Cloud side. That’s easy and convenient to quickly setup the device and do some trials. If you are willing to use your own AWS infrastructure, you need to follow this typical roadmap:
- Register against Amazon for a new account (https://aws.amazon.com).
- Select an AWS Region (Important: cross-regioning is not allowed. an us-west-2 device can only reach and use us-west-2 services.).
- Create a Device CA certificate and register it in AWS’s console.
- Create a Device certificate/key couple based on the Device CA certificate (using openssl for example).
- Create an AWS policy for your device (allow/deny access to AWS’ s resources).
- Create an AWS lambda function to auto-register your devices (or manually register your device in AWS’s console).
- Create an AWS lambda function to auto-select access policies (or manually select a policy for your device in AWS’s console).
And on the device’s side:
- change MQTT broker’s name (your AWS instance FQDN).
- load certificates (Device CA and device).
- load device’s key.