SpringCard H663 and H512 families are a group of NFC devices / contactless smartcard readers. This document explains how to upgrade their firmware, using the new SpringCard Firmware Upgrade Utility.
At the date of writing, this document refers to the products listed below:
- H663A and H663S ‘bare’ modules, H663-USB module plus antenna,
- CrazyWriter-HSP,
- CSB-HSP,
- H663A and H512S ‘bare’ modules, H512-USB module plus antenna,
Please read the datasheet of every product for specifications and the detailed list of features.
Important disclaimer:
Please note that SpringCard is not responsible for any procedure that end user performs. Please note that products can not be recovered from improper firmware upgrade or mis-configuration !! YOU’RE FOLLOWING THIS PROCEDURE AT YOUR OWN RISK.
Non-Windows OS
Linux/Mac/Unix users are welcomed to use the open-source DFU-Programmer provided by Atmel and contributors and available at http://dfu-programmer.sourceforge.net/ . SpringCard H663 and H512 use the at32uc3b0256 chip.
The syntax is:
dfu-programmer at32uc3b0256 erase

dfu-programmer at32uc3b0256 flash --suppress-bootloader-mem

dfu-programmer at32uc3b0256 start
Getting started
Requirements
The SpringCard Firmware Utility 2013 works on Windows XP/Vista/7/8, on both x86 and x64 releases.
Download and install SpringCard SU13168 package
Download
Download the SU13168 installation package at address
Installation
Double-click the downloaded executable.
Make sure you install those 2 components:
- “SpringCard Firmware Upgrade Utility”
- “DFU USB Driver for Atmel CPUs”
Notes regarding the DFU USB Driver
The microcontroller used by SpringCard H663 and H512 families is an Atmel AVR32 (AT320UC3B0256). This microcontroller is upgradeable on the field, through its USB link. A driver is provided by Atmel to connect the microcontroller through USB, using the USB DFU (Device Firmware Upgrade) standard.
The SpringCard SU13168 package contains release 1.2.2 of Atmel USB Driver for DFU. For any issue related to the driver itself, please visit http://dfu-programmer.sourceforge.net/ and http://sourceforge.net/projects/dfu-programmer/ do download a newer version or to look for support.
Open-source components
The FUU software make uses of pieces of source code released under various open-source licences, including the GNU Public Licence (GPL).
To comply with the GPL, the FUU software it itself released under the GPL.
Check “source code to the open-source components” during install to get the source code.
Locate and download the firmware for your reader
PC/SC readers
The firmware files for the PC/SC Readers are located under https://files.springcard.com/firmwares/springprox/
The subdirectories are named after the version (for instance https://files.springcard.com/firmwares/springprox/1-74 stores all the firmware in the 1.74 branch).
In every subdirectory, the files targeting these families of products are named
- uc3b0256_rc663_h663_(version).hex for H663 group
- uc3b0256_pn512_h512_(version).hex for H512 group
Download the firmware you want to use and save it locally on your hard drive.
Quickly download latest firmware’s version
The links below will enable you to download directly the latest version of each firmware :
- H663 firmware for H663S, H663A, H663-USB, CrazyWriter-HSP, CSB-HSP.
- H512 firmware for H512S, H512-USB
Working with SpringCard Firmware Upgrade Utility (FUU)
Create your 1st project
When you launch the software for the first time, the list of Existing Projects is empty.

Check Create a new Project, and click OK.
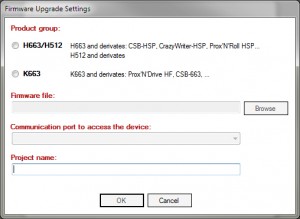
Check Product group: H663/H512. The software opens a dialog box to let you select the firmware you want to put into the product (click Browse if the dialog box doesn’t open automatically).
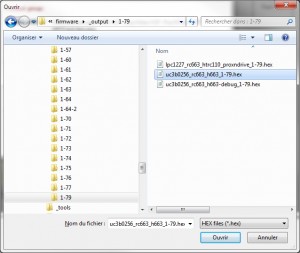
Browse to the folder where you have downloaded the firmware earlier, and select the firmware file (extension is .HEX).
Back to the “Firmware Upgrade Settings” box, note that a Project Name has been generated from the name of the firmware file.
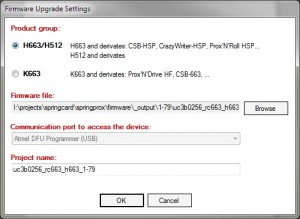
You may change the name, or just proceed by clicking OK.
Flash your device
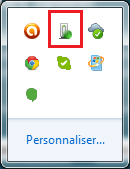
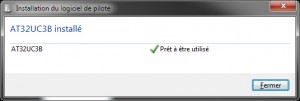
Put the device into Flash Mode (see below for a detailed procedure, depending on the hardware). Wait until the USB driver “Atmel DFU for AT32UC3B” is installed and activated by Windows.
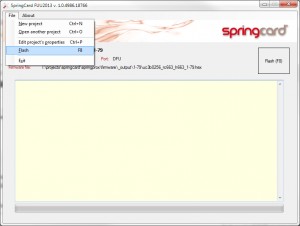
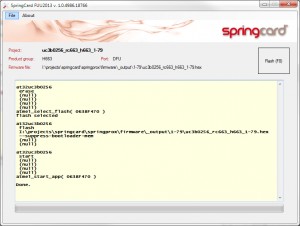
Click Flash under the File menu.
The procedure takes less than 20 seconds to terminate.
Don’t forget to put the reader back into operation mode!
Troubleshooting
In case the software says “No DFU device found”, please open Windows’ Device Manager, and check that your device is listed as “Atmel USB” and without error mark.
- If the device is not listed at all –> check hardware (cable, ower supply etc)
- If the device is listed as PC/SC reader, RFID Scanner, or other SpringCard, device –> make sur the device is in Flash Mode and reset it until it boots on its DFU bootloader,
- If an error mark is present –> check the DFU USB Driver version, contact developers of the driver for support.
Open an Existing Project
Once a Project has been created, FUU allows you to re-open it later on.

Make sure the Existing Projects box is checked, select the Project in the list and click OK.
You may also double-click the Project you want in the list.
Putting your device into Flash Mode
Bare H663 or H512 modules
Tie the /FLASH pin to GND before resetting (or powering up) the device to make it starts on its DFU bootloader.
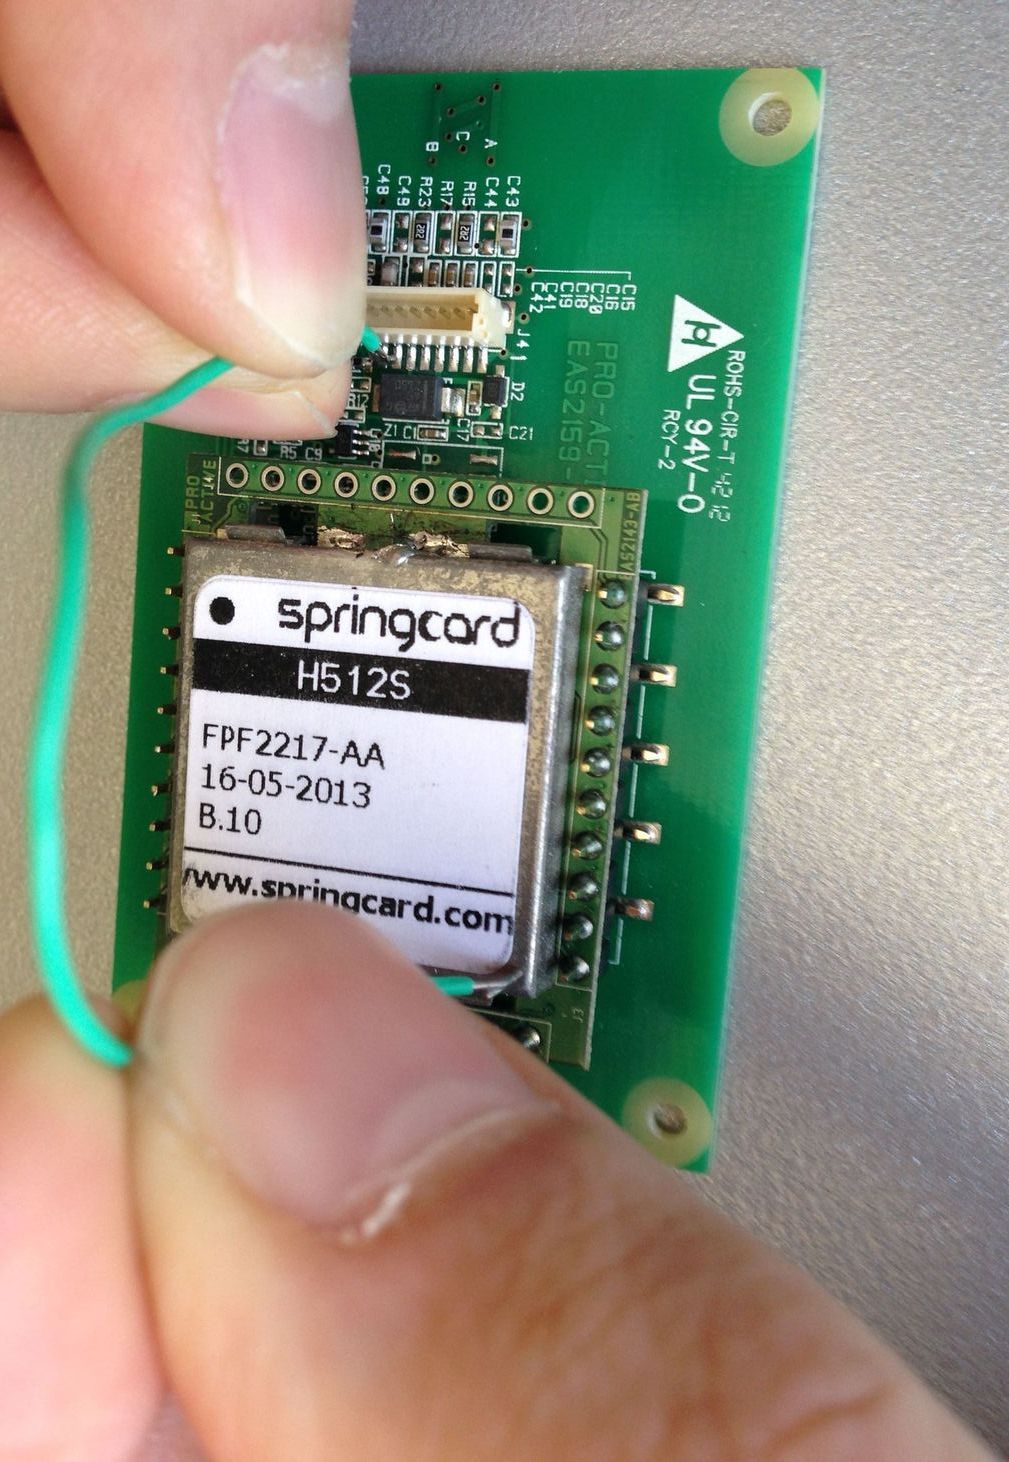
For the H512, you can use a simple cable like this (connect the second pin to the reader’s housing) :
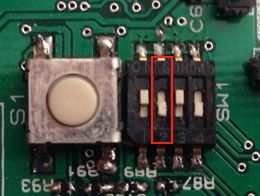
If a switch is available, you can use it (set to ON for firmware update):

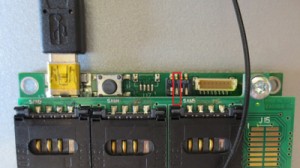
Modules on antennas
Use the method depicted below for the bare modules, or shunt pins 1 and 7 on the JST connector.
CrazyWriter-HSP
Locate the 4 configuration switches and set them to ON ON ON OFF to load the firmware.
Remember to put the switches back to normal position ON OFF ON OFF afterwards.
CSB-HSP
Remove the 4 screws to open the product’s shell.
Locate the 4 configuration switches and set them to ON ON ON OFF to load the firmware.
Remember to put the switches back to normal position ON OFF ON OFF afterwards.
Pay attention when closing the shell that the screws at the front are shorter than the screws at the back!