SpringCard CSB6 Family is a group of contactless smartcard readers, offering various functions and three different operating modes : PC/SC (CCID), Legacy (virtual communication port), RFID scanner (keyboard emulation). All these products share a common hardware platform, based on the same microcontroller. This document explains how to upgrade the firmware, using the flash upgrade software provided by the manufacturer of the microcontroller.
At the date of writing, this document refers to the four products in the CSB6 Family :
- CSB6,
- Prox’N’Roll (all version),
- CrazyWriter,
- EasyFinger.
Please read the datasheet of every product for specifications and the detailed list of features.
For the Prox’N’Roll you can also look at this vidéo:
http://www.youtube.com/watch?v=E2rLlTgi9Zw
Important disclaimer:
Please note that SpringCard is not responsible for any procedure that end user performs. Please note that not products can be recovered from improper firmware upgrade or mis-configuration !! YOU’RE FOLLOWING THIS PROCEDURE AT YOUR OWN RISK.
Getting started
The microcontroller used by SpringCard CSB6 Family is Renesas H8S/2212UF. This microcontroller is upgradeable on the field, through its USB link, thanks to the software ‘Flash Development Toolkit’ (FDT) version 4 or newer, provided by Renesas.
FDT works on 32-bit versions of Windows 2000/XP/Vista/7. You can’t use in on a 64-bit machine. There’s no equivalent tool for other operating systems.
Locate and download the firmware for your device
PC/SC (and Legacy)
The firmware files for PC/SC (and Legacy) products are located under https://files.springcard.com/firmwares/springprox/. The subdirectories are named after the version (for instance https://files.springcard.com/firmwares/springprox/1-70 stores all the firmware in the 1.70 branch).
In the subdirectories, the files targeting this family of products are named 2212_rc632_(product name and code)_(product version).mot. Always check that the product name and code field matches the product you actually have.
RFID Scanner
The firmware files for RFID Scanner products are located under https://files.springcard.com/firmwares/iwm2_scan/. The subdirectories are named after the version (for instance https://files.springcard.com/firmwares/iwm2_scan/1-40 stores all the firmware in the 1.40 branch).
In the subdirectories, the files targeting this family of products are named 2212_rc632_(product name and code)_rfid-scanner_(product version).mot. Always check that the product name and code field matches the product you actually have.
Quickly download latest firmware’s version
The links below will enable you to download directly the latest version of each firmware :
Important disclaimer:
Generally speaking, putting the wrong firmware in any product is possible, and may appear to work, but this is not the way the product is intend to operate. Please make sure to always put the appropriate firmware in the actual product you have. Flashing a PC/SC reader with a RFID Scanner firmware (and vice versa) is not supported.
Download and install Renesas FDT
Latest version of FDT is available free of charge at Renesas’ :
- Go to www.renesas.com .
- Navigate to Development Tools & Flash and PROM Programming & Flash Development Kit.
- Choose « Download the latest version of FDT free of charge ».
You’ll be prompted for your company details before accessing the download.
Note : Renesas’ web site changes frequently, and its URLs are not « user friendly », therefore preventing us to give the actual link here.
Alternatively, we provide for convenience download FDT 4.09 (R03) at https://files.springcard.com/misc/fdtv409r03.exe but please check whether a newer version has been made available at Renesas’.
Create a workspace
Launch FDT from Start Menu.
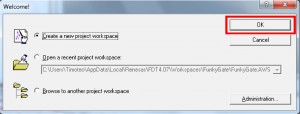
Choose « create a new project workspace », and click « OK ».
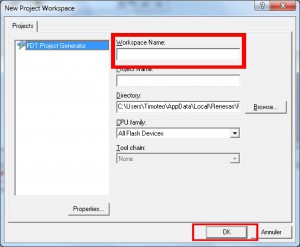
Enter a name for your new project workspace (for instance, CSB6 Family), and click « OK ». If left blank, the project name defaults to the same value as the workspace name.
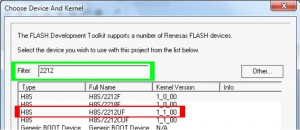
Enter 2212U in the filter field, and choose H8S/2212UF in the list. Click « Next » to continue.
Choose port « USB Direct », and click « Next ».
In the following pages, click « Next » (leaving all options to their default value), until « Finished ».
Add a firmware to your workspace
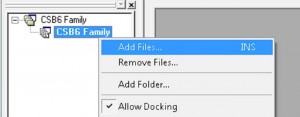
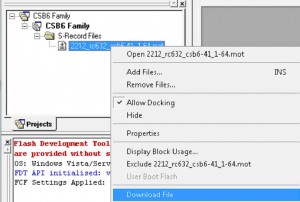
In the tree on the left, right click on the project. Then, in the popup menu, click on « Add Files… »
Browse to the firmware file you want to download in the product (firmware files have the « .mot » extension).
You may later on add other firmware files to your project if you have different products or if you re-use the same project with a future version.
Put the device in flash upgrade mode
Every product in the CSB6 Family has either a switch or a push-button to go to the firmware upgrade mode.
All products but Prox’N’Roll
CSB6, CrazyWriter and EasyFinger have 4 configuration switches. Switch number 2 is devoted to firmware upgrade.
Unplug your device.
Open the casing (CSB6 and EasyFinger: there are a few PZ3 screws to unscrew).
Note the current position of the switches.
Move all the switches to ON.
Plug the device to the computer’s USB port again. For EasyFinbger, plug the external power supply as well.
The device is now enumerated as an “USB Direct” device and handled by the driver that has been installed together with FDT.
Prox’N’Roll (prior to version EAN8I9P-FD)
Warning
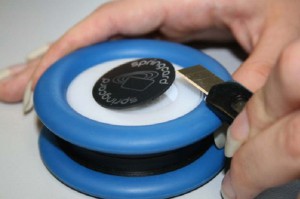
The top sticker (lexan) must be removed in order to unscrew the cover, before being able to access the firmware upgrade switch. As the sticker is glued, this is likely to destroy it. Please contact our sales team should you need to buy spare stickers.
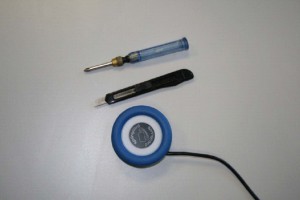
You’ll have to insert a sharp blade (cutter) under the sticker to remove it. PLEASE BE CAREFUL NOT TO GET HURT.
Unplug your Prox’N’Roll.
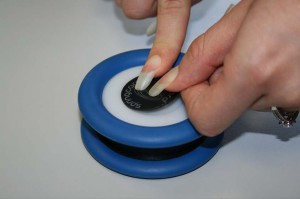
Remove the top sticker.
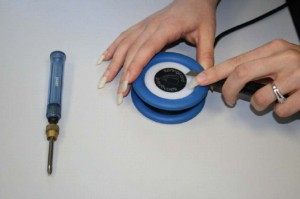
Use your stanley knife carefully.
There’s a PZ3 screw underneath the sticker.
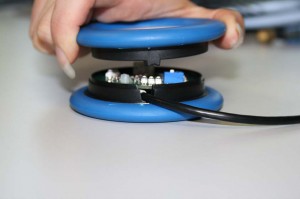
Unscrew the main screw.
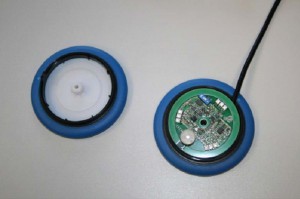
You now have access to the PCB. There’s only one switch (with a blue body), the firmware upgrade switch.
Move the switch to the ON position.

Plug the Prox’N’Roll to the computer’s USB port again. It is now enumerated as an “USB Direct” device and handled by the driver that has been installed together with FDT.
Prox’N’Roll (new versions after EAN8I9P-FD)
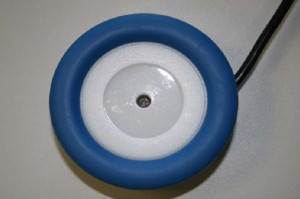
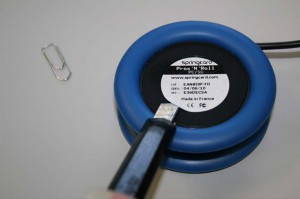
The new version of Prox’N’Roll has got a push-button. This button is accessed via a tiny hole hidden under the reader’s bottom label. You need a paper clip to push the button and don’t have to open the reader.
Unplug your Prox’N’Roll.
If you manage to sense the hole through the bottom label, you may insert the paper clip through the label. Overwise, remove the bottom label using a stanley knife.
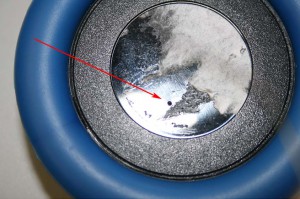
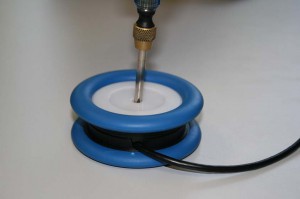
Underneath the label, you find a tiny hole.
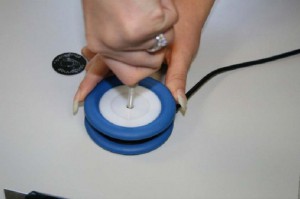
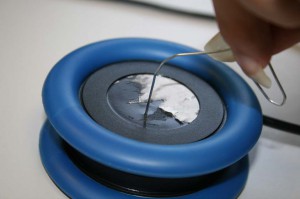
Insert a paper-clip in the hole and push firmly until you feel or hear the button. Keep the button pressed.
While keeping the button pressed, plug the Prox’N’Roll to the computer’s USB port again. It is now enumerated as an “USB Direct” device and handled by the driver that has been installed together with FDT. Once the driver is loaded (this may take up to 30 seconds on the first time, but normally less than 5 seconds afterwards) you may depress the button, removing the paper-clip from the hole.
Load the firmware into the device
Back to FDT screen, right-click on the file you want to load in the device.
In the popup menu, click « Download File ».
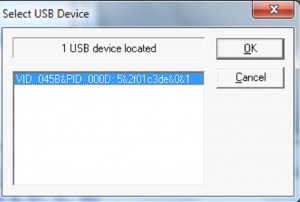
FDT now prompts you to select the target USB device. If you’ve plugged only one product at a time, there must be only one target!
Select the only target, and click « OK ».
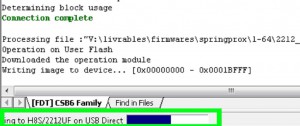
Wait during the flash operation (this takes 20 to 60 seconds).
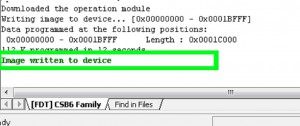
When done, FDT displays this message:
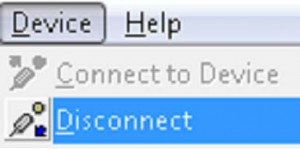
Terminate the procedure by clicking « Disconnect » in the « Device » menu.
Put the device back in operation mode
All products but Prox’N’Roll
Put back the switches in the position you’ve noted in before flashing.
Unplug/plug the device again.
Help with switch position
- Switch 1 must always be ON
- Switch 2 must be OFF for normal operation
- Switch 3 must be ON for USB-powered devices (no external power supply) and OFF for devices that have an external power-supply (EasyFinger for instance).
- Switch 4 must be OFF for normal operation. Set it to ON only when instructed to do so by SpringCard’s support or R&D team.
Prox’N’Roll (prior to version EAN8I9P-FD)
Move the switch back to the OFF position.
Close the casing and put the sticker back in position.
Unplug/plug the device again.
Prox’N’Roll (new versions after EAN8I9P-FD)
Unplug/plug the device again (without the paper-clip).
Optional step
It’s possible, for example if your product’s LEDs are RED that you need to follow an additional step to configure your product. See this page for more information.
